For more information about smart tags and how they work, see the Smart Tags documentation.
1. Create (or edit) a Claim/Incident form template
- Go to Company Settings on your side bar. Navigate to Form
- Create a new form (or open an existing one)
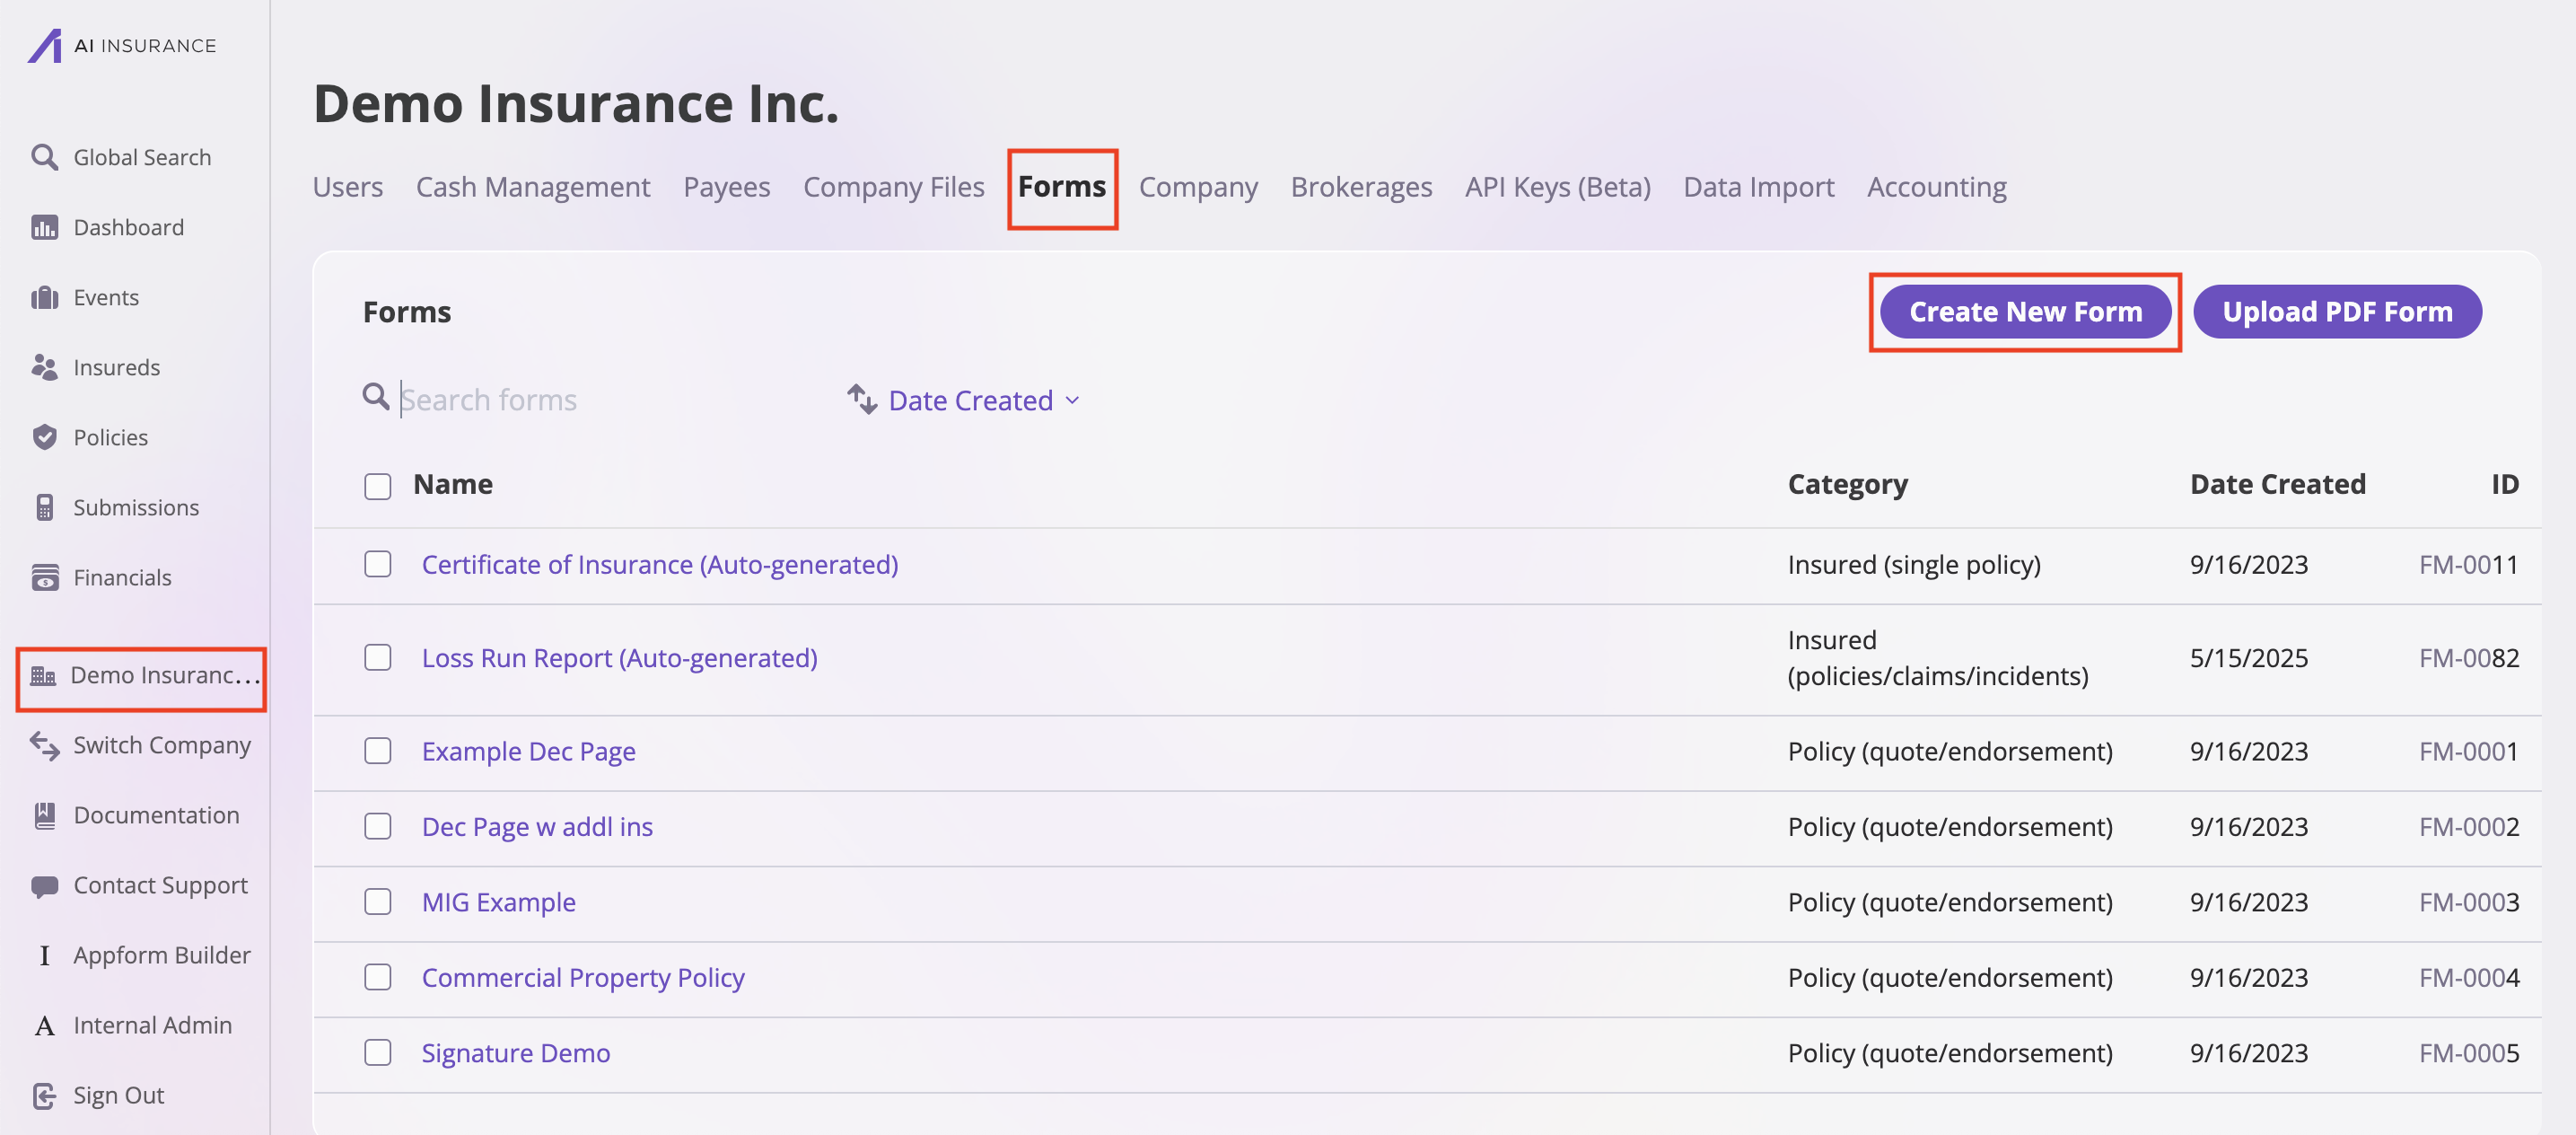
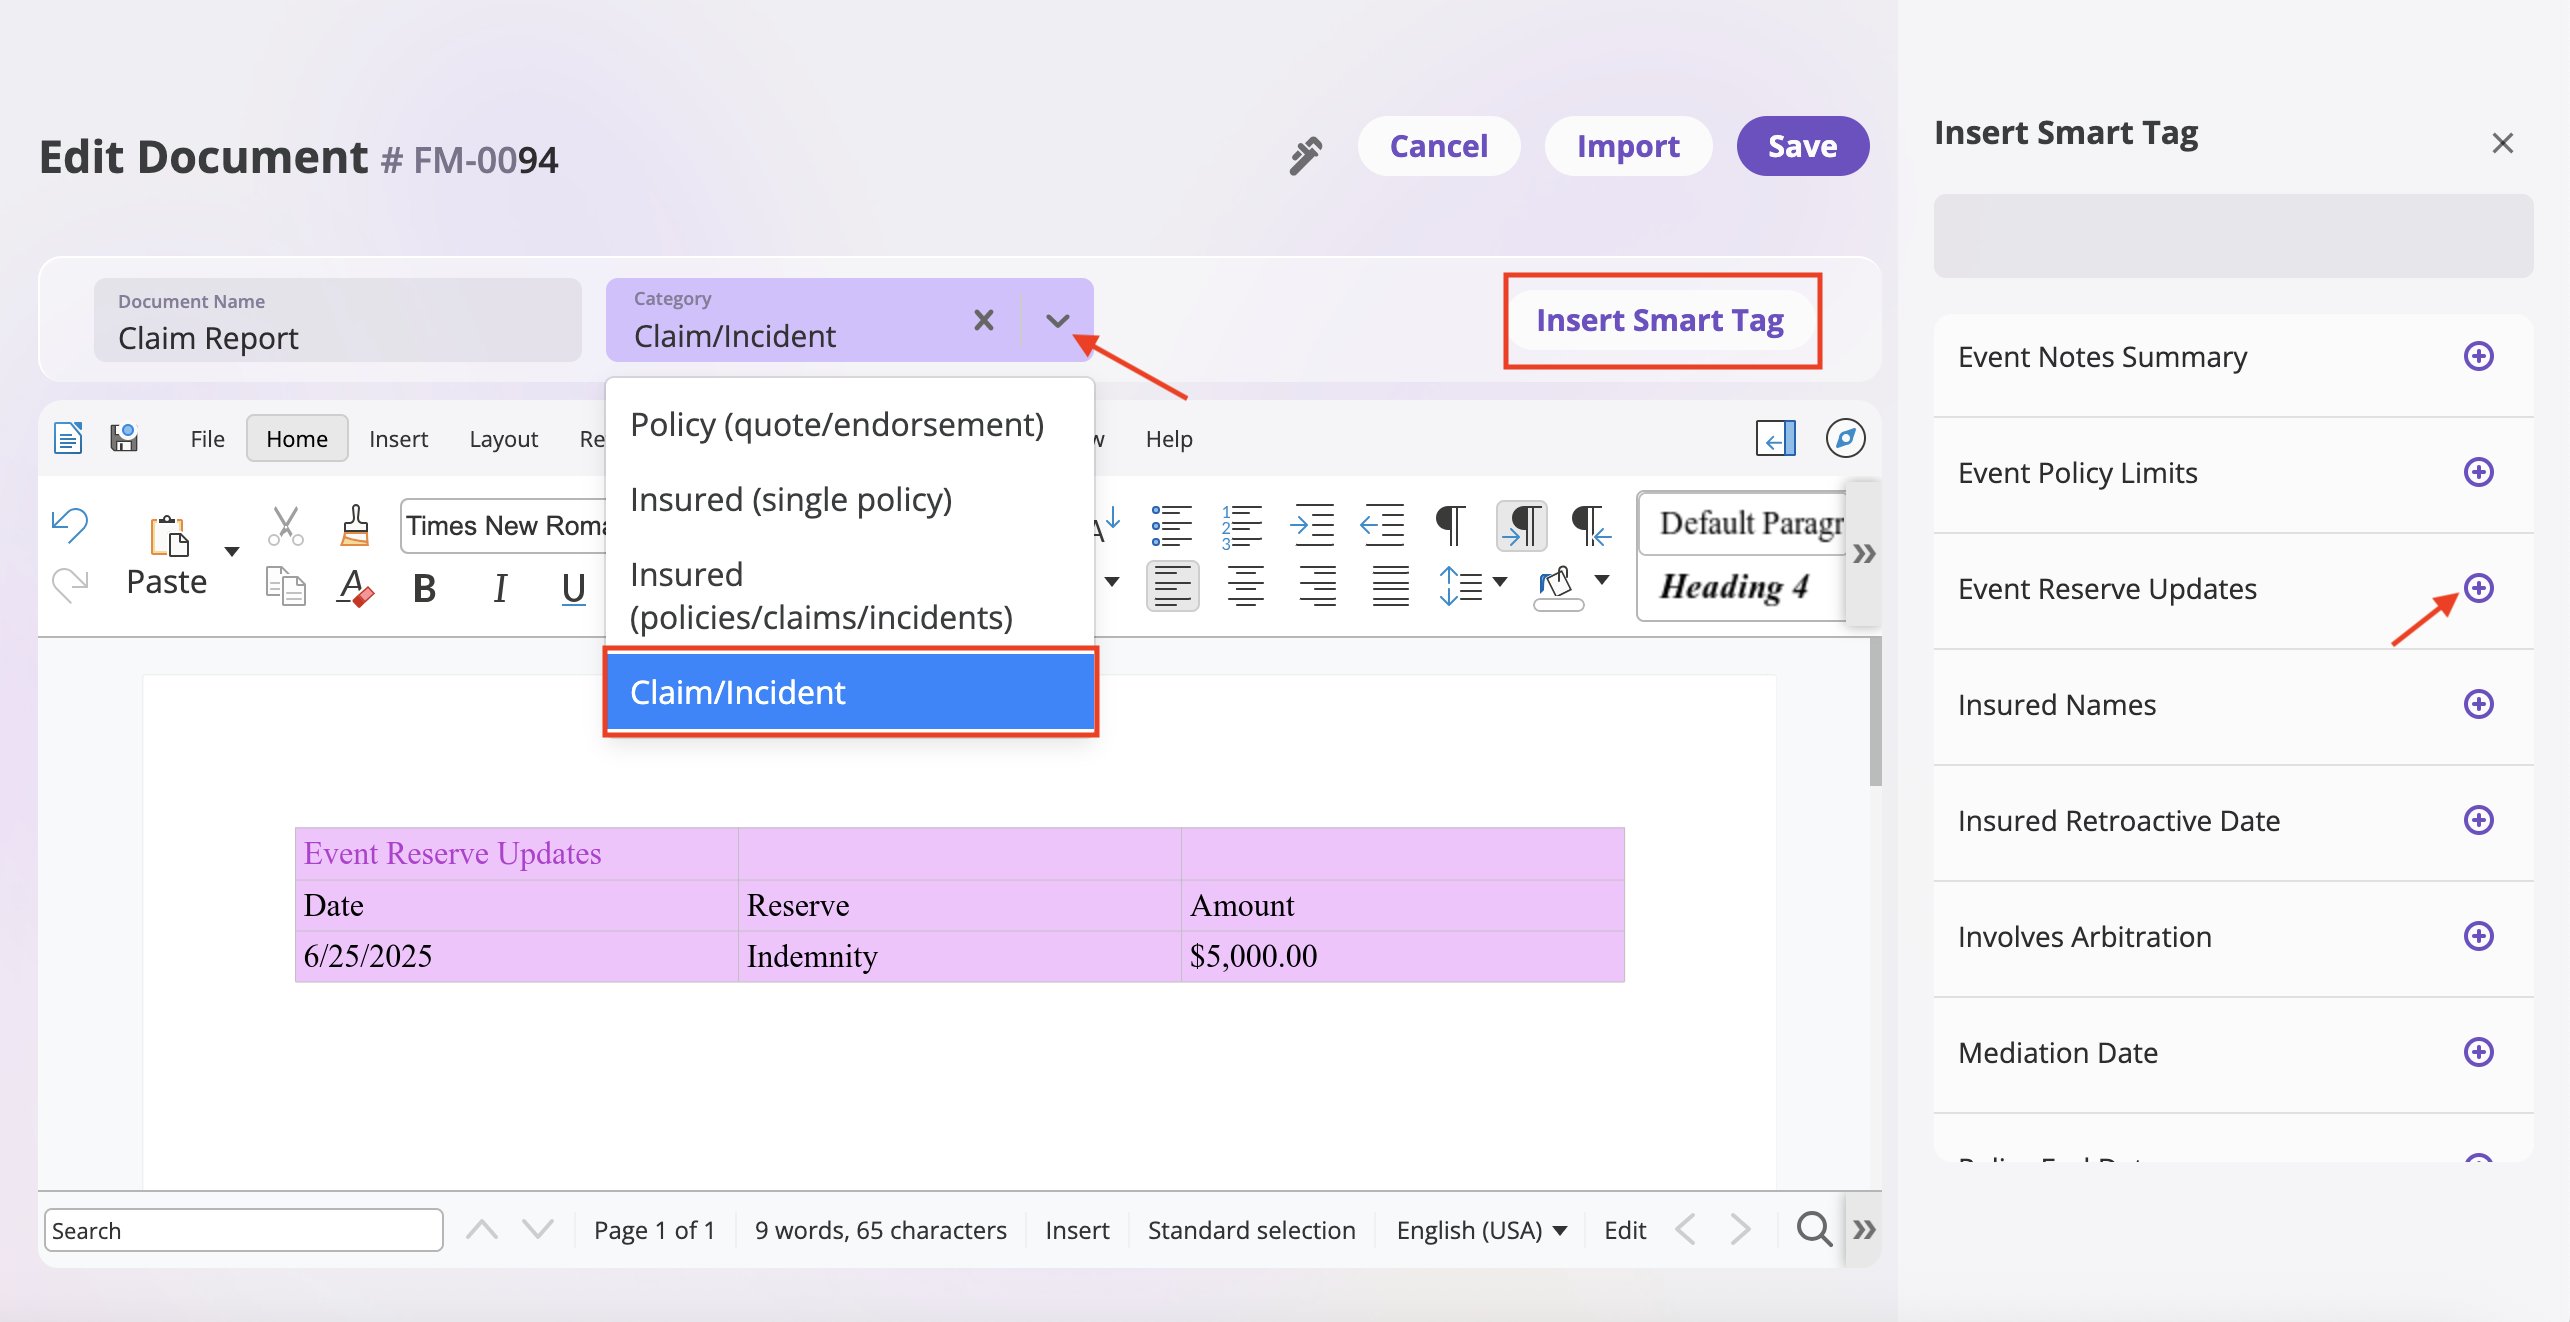
- Set Category to Claim/Incident.
- In the form editor, click Insert Smart Tag (top-right).
- From the sidebar, select Event Reserve Updates to insert the tag where you want the table to appear.
- Save the template.
The tag can also be inserted later when editing a generated form (see step 3).
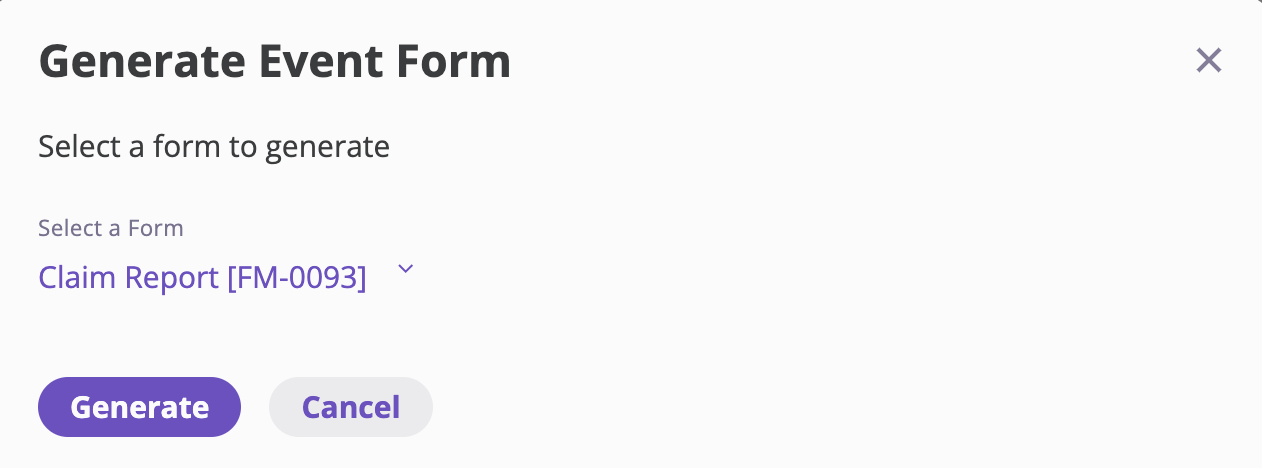
2. Use the template from a claim/incident
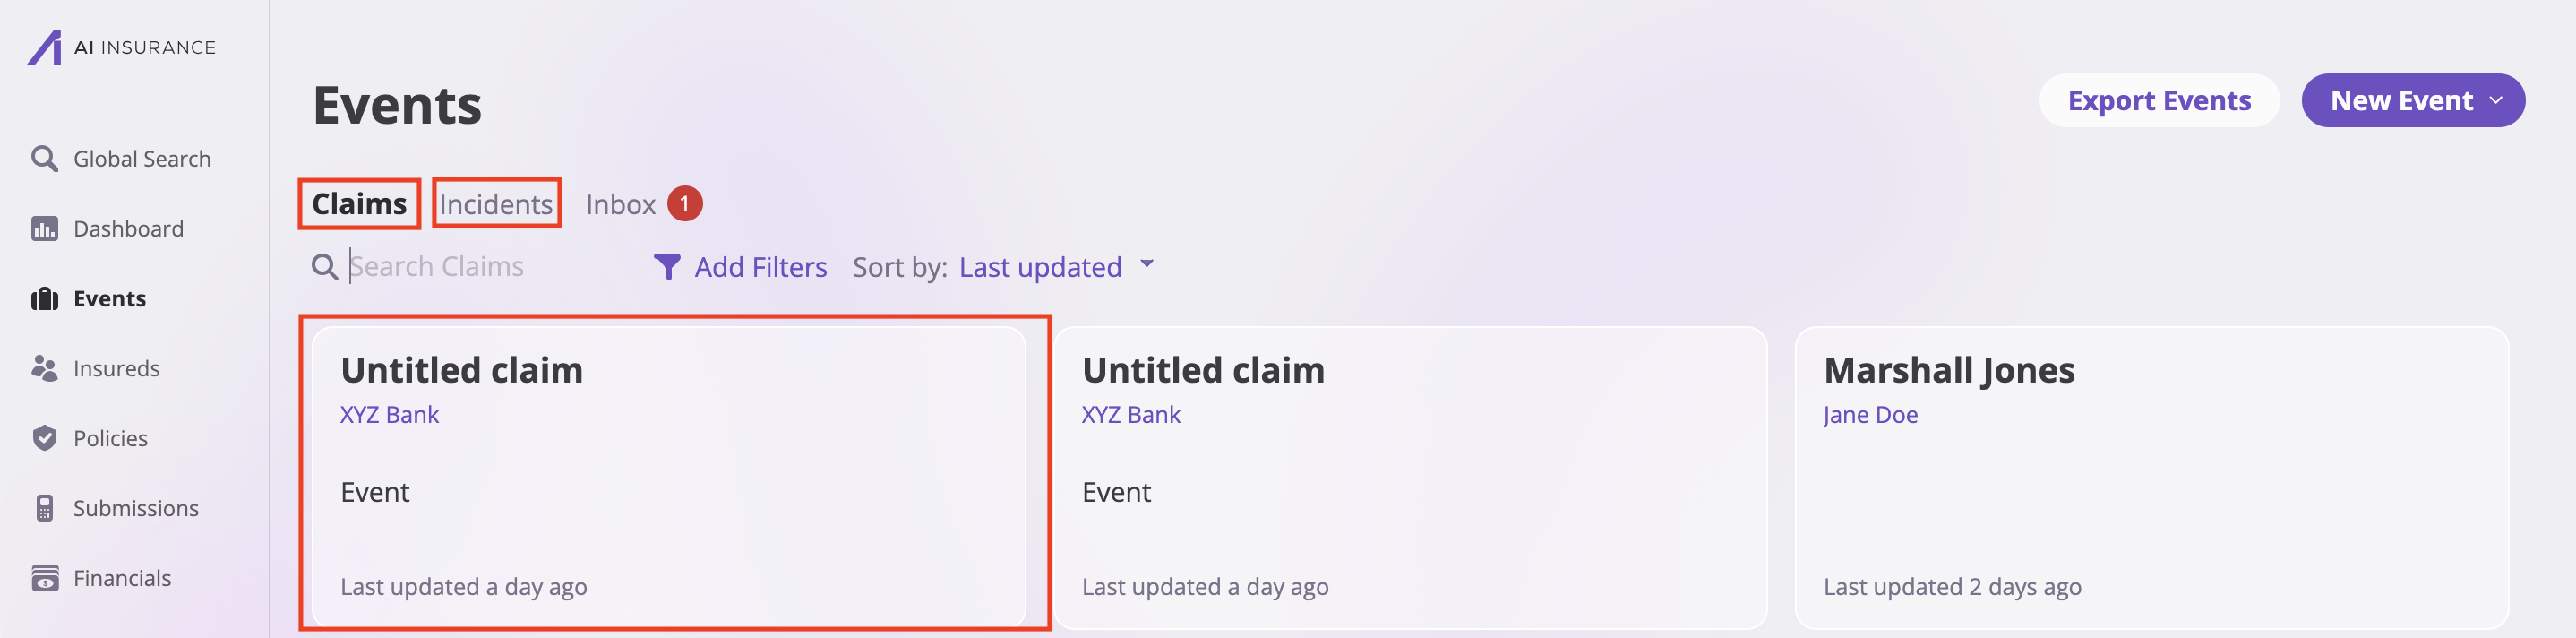
- Go to the Events tab on your sidebar.
- Select either Claims or Incidents tab depending on your event type.
- Find and click on the specific Event (claim/incident) record you want to generate a form for.
- On the event page, click the Actions dropdown in the top-right corner.
- Select Generate Claim Form from the dropdown menu.
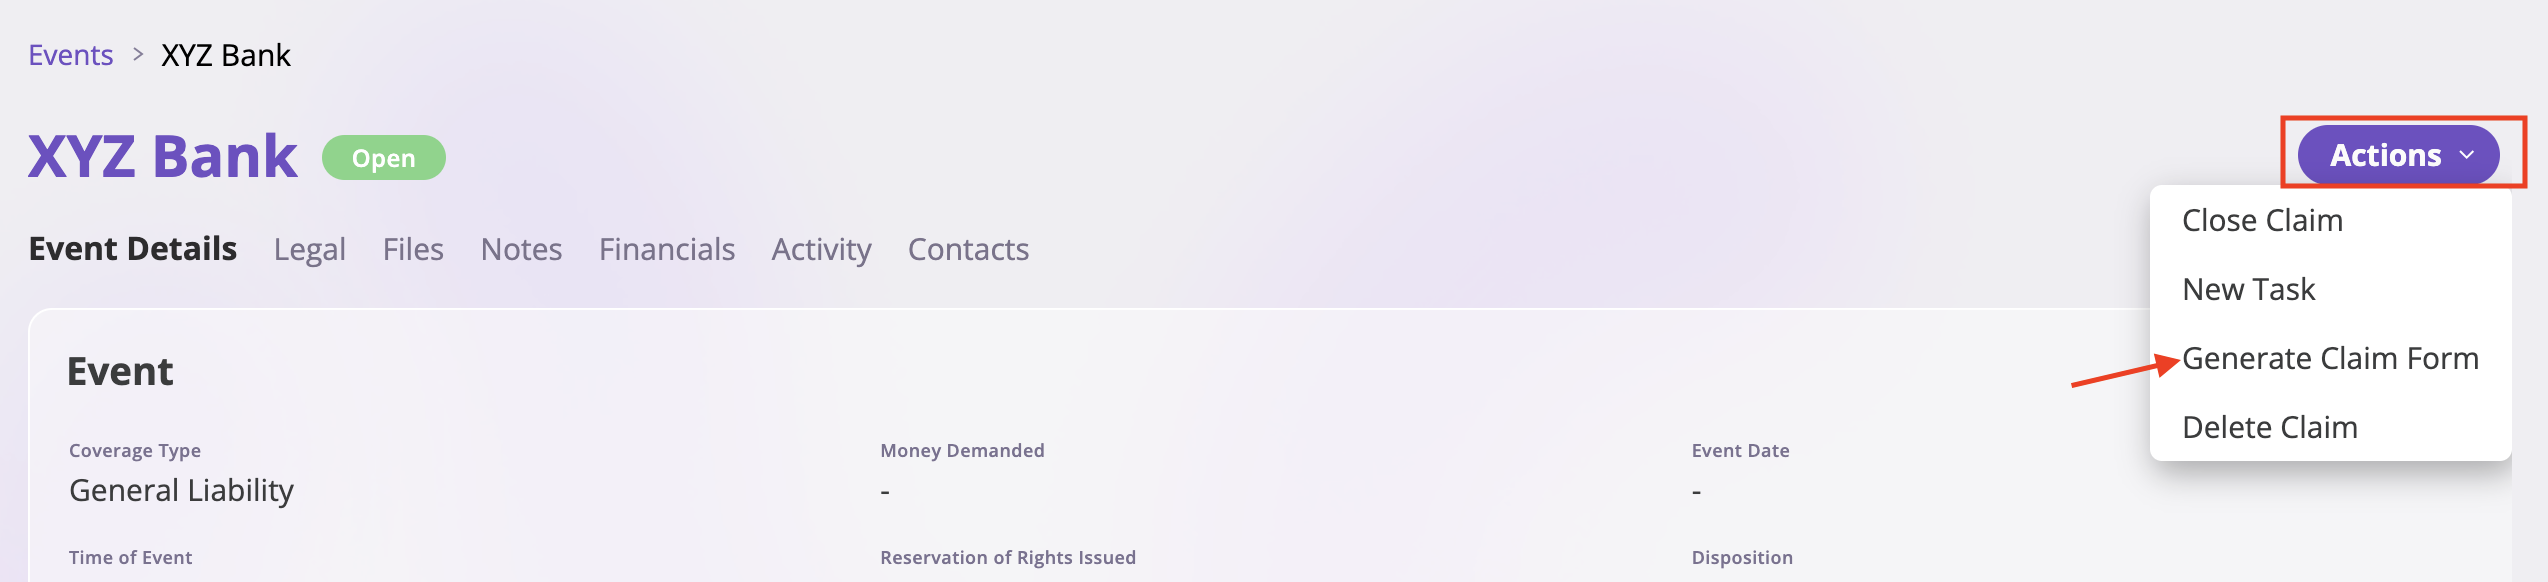
- Choose your Claim/Incident template that includes the Event Reserve Updates tag.
- Click Generate. The system generates a document and populates the smart tag from the event’s reserve data.
3. Edit a generated form
- If you need to tweak the output or add the tag after generation:
- Open the generated form you created before. Click Edit

- Click Insert Smart Tag and pick Event Reserve Updates (if it wasn’t already in the template).
- Save or download as needed.
- Open the generated form you created before. Click Edit