Understanding Parent-Child Account Relationships
The accounting system supports hierarchical account structures where parent accounts can have child accounts that inherit their payable/receivable status and other properties.Parent Accounts
Parent accounts serve as high-level groupings that define the overall category and properties:- Payable Parent: Money owed by the insurance company (e.g., “ULAE”, “IBNR LAE”)
- Receivable Parent: Money owed to the insurance company (e.g., “Policy Invoice”, “Premium Receivable”)
Child Accounts
Child accounts are subordinate to parent accounts and inherit their parent’s properties:- Inherited Status: Child accounts automatically inherit the payable/receivable status from their parent
- Detailed Tracking: Allow for more granular tracking within the parent category
- Consolidated Reporting: Child account balances roll up to the parent account
Example Parent-Child Structure
Payable Accounts:- Parent: “ULAE” (Payable, Event Invoice, Yes for Reserves)
- Child: “ULAE - Legal Fees” (inherits Payable, Event Invoice, Yes for Reserves)
- Child: “ULAE - Adjuster Fees” (inherits Payable, Event Invoice, Yes for Reserves)
- Parent: “Policy Invoice” (Receivable, Policy Invoice, No for Reserves)
- Child: “Policy Invoice - Premium” (inherits Receivable, Policy Invoice, No for Reserves)
- Child: “Policy Invoice - Fees” (inherits Receivable, Policy Invoice, No for Reserves)
Set Up Custom Account Types
Access Company Settings
- Navigate to Company Settings from your account menu
- Select the Accounting tab
- You’ll see the accounting configuration interface

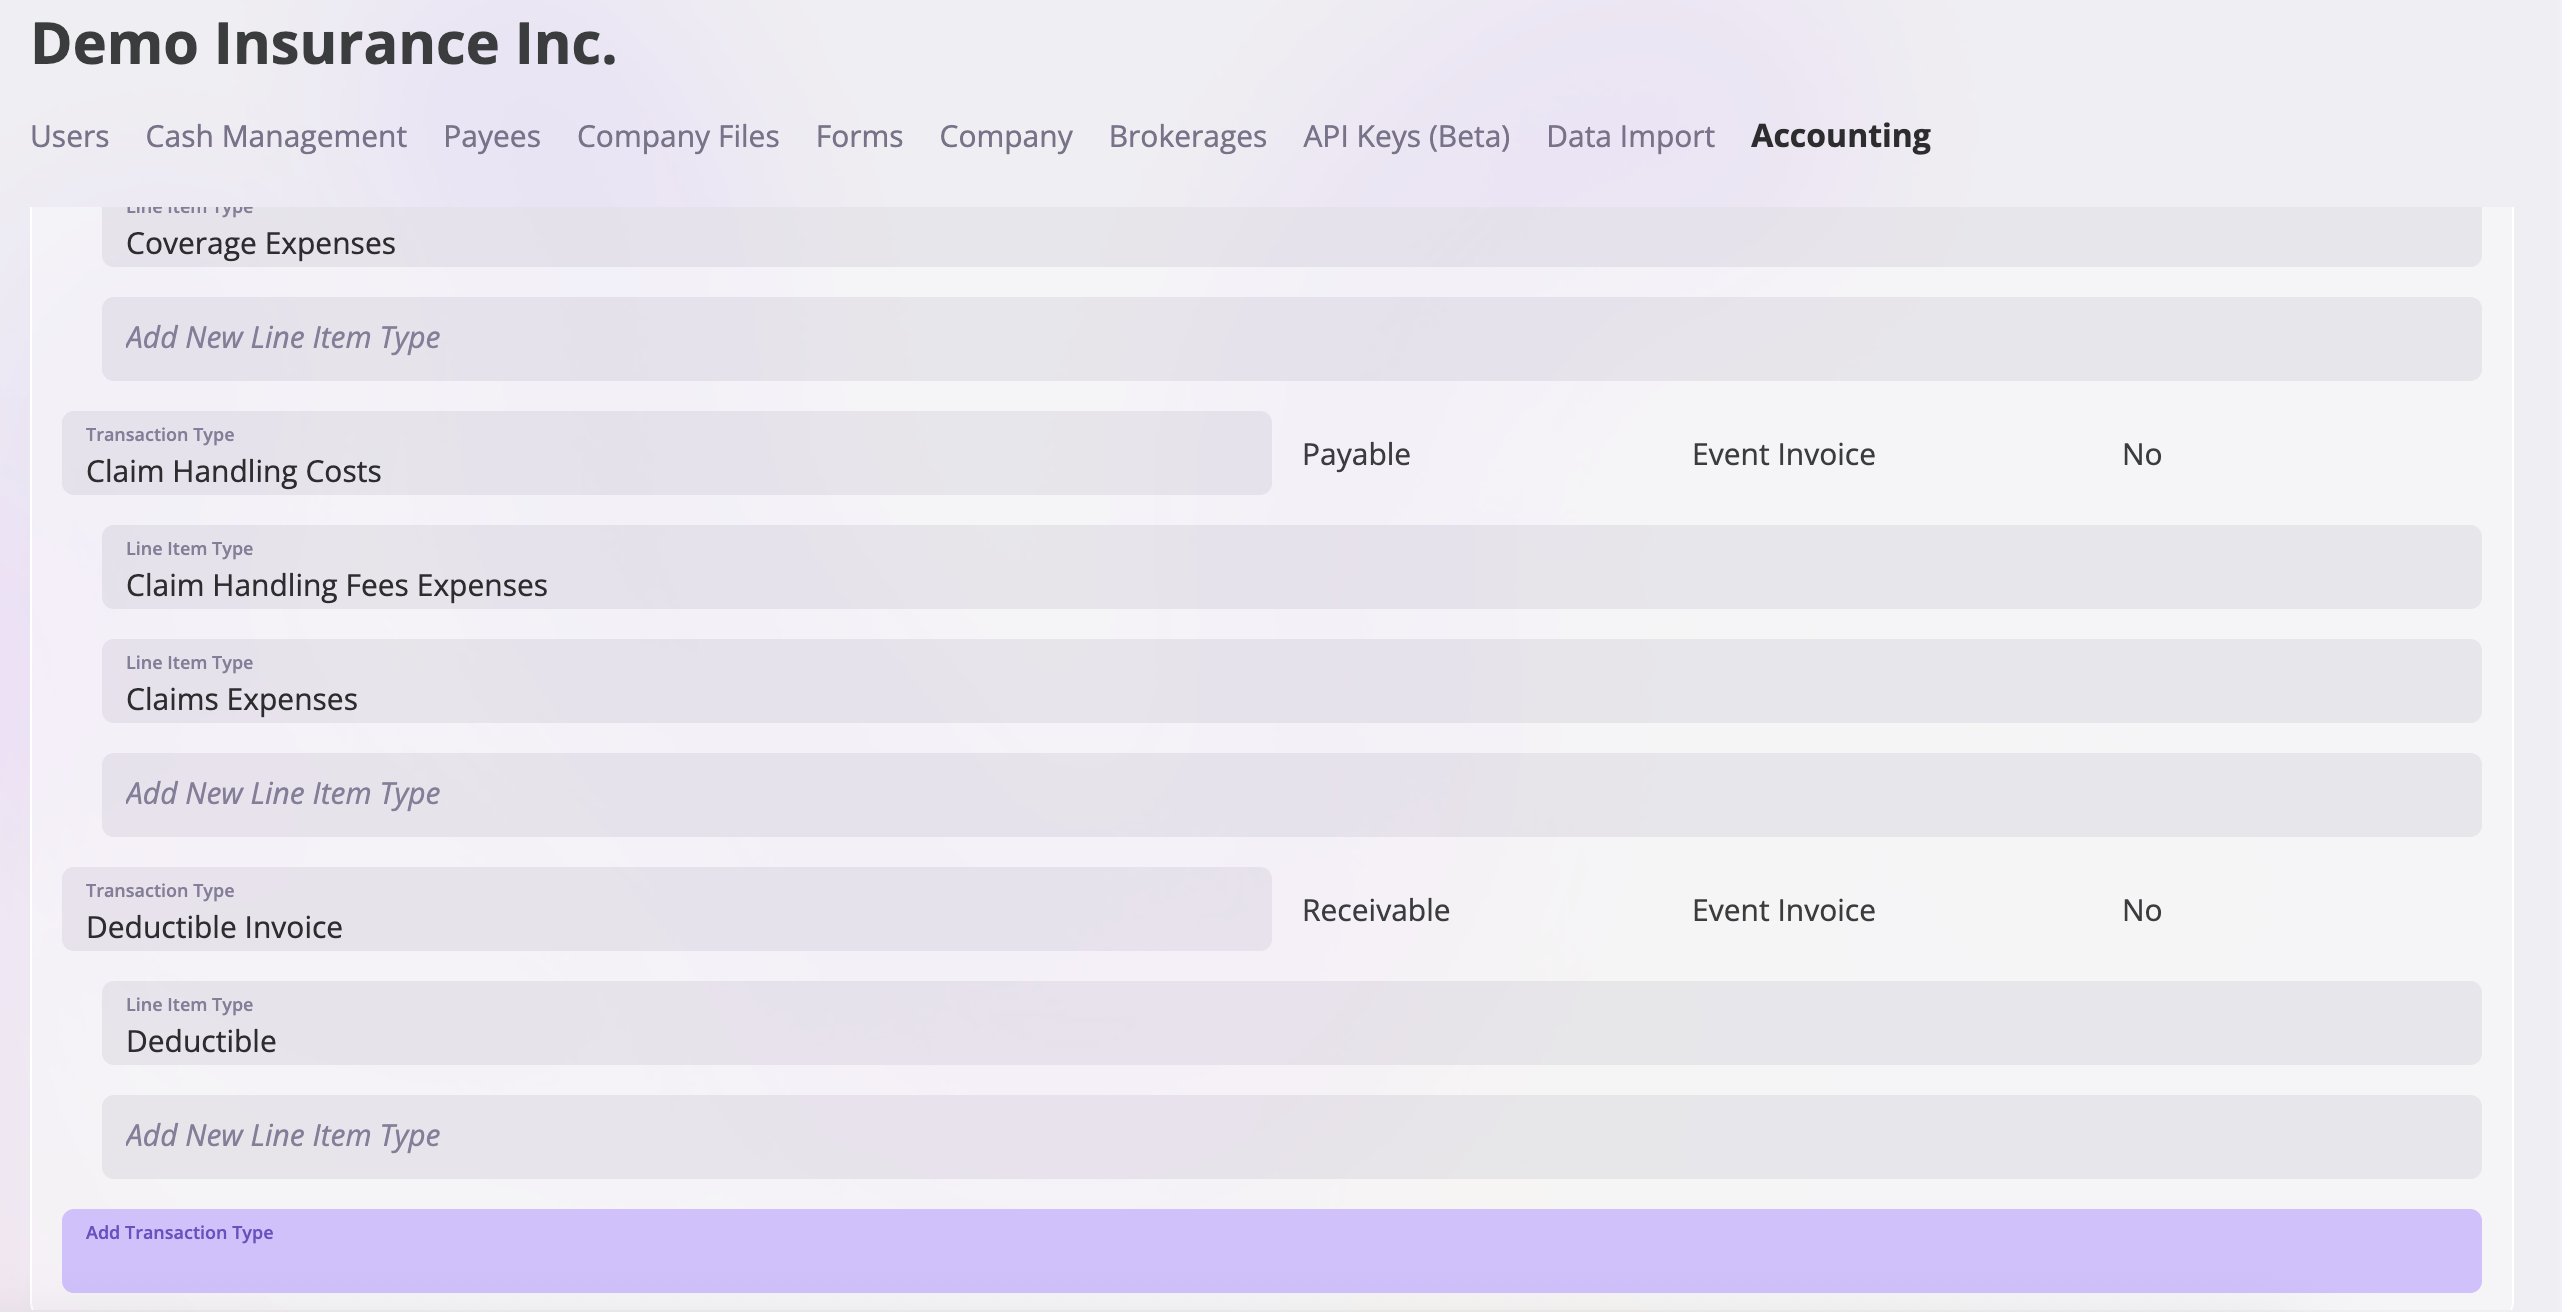
Add Custom Transaction Types
Follow these generic steps to add any custom account type:- Click Edit in the accounting section
- Scroll down to find “Add Transaction Type” at the bottom
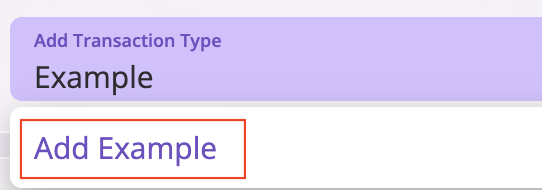
- Enter your custom transaction type name
- Click “Add [Your Transaction Type]”
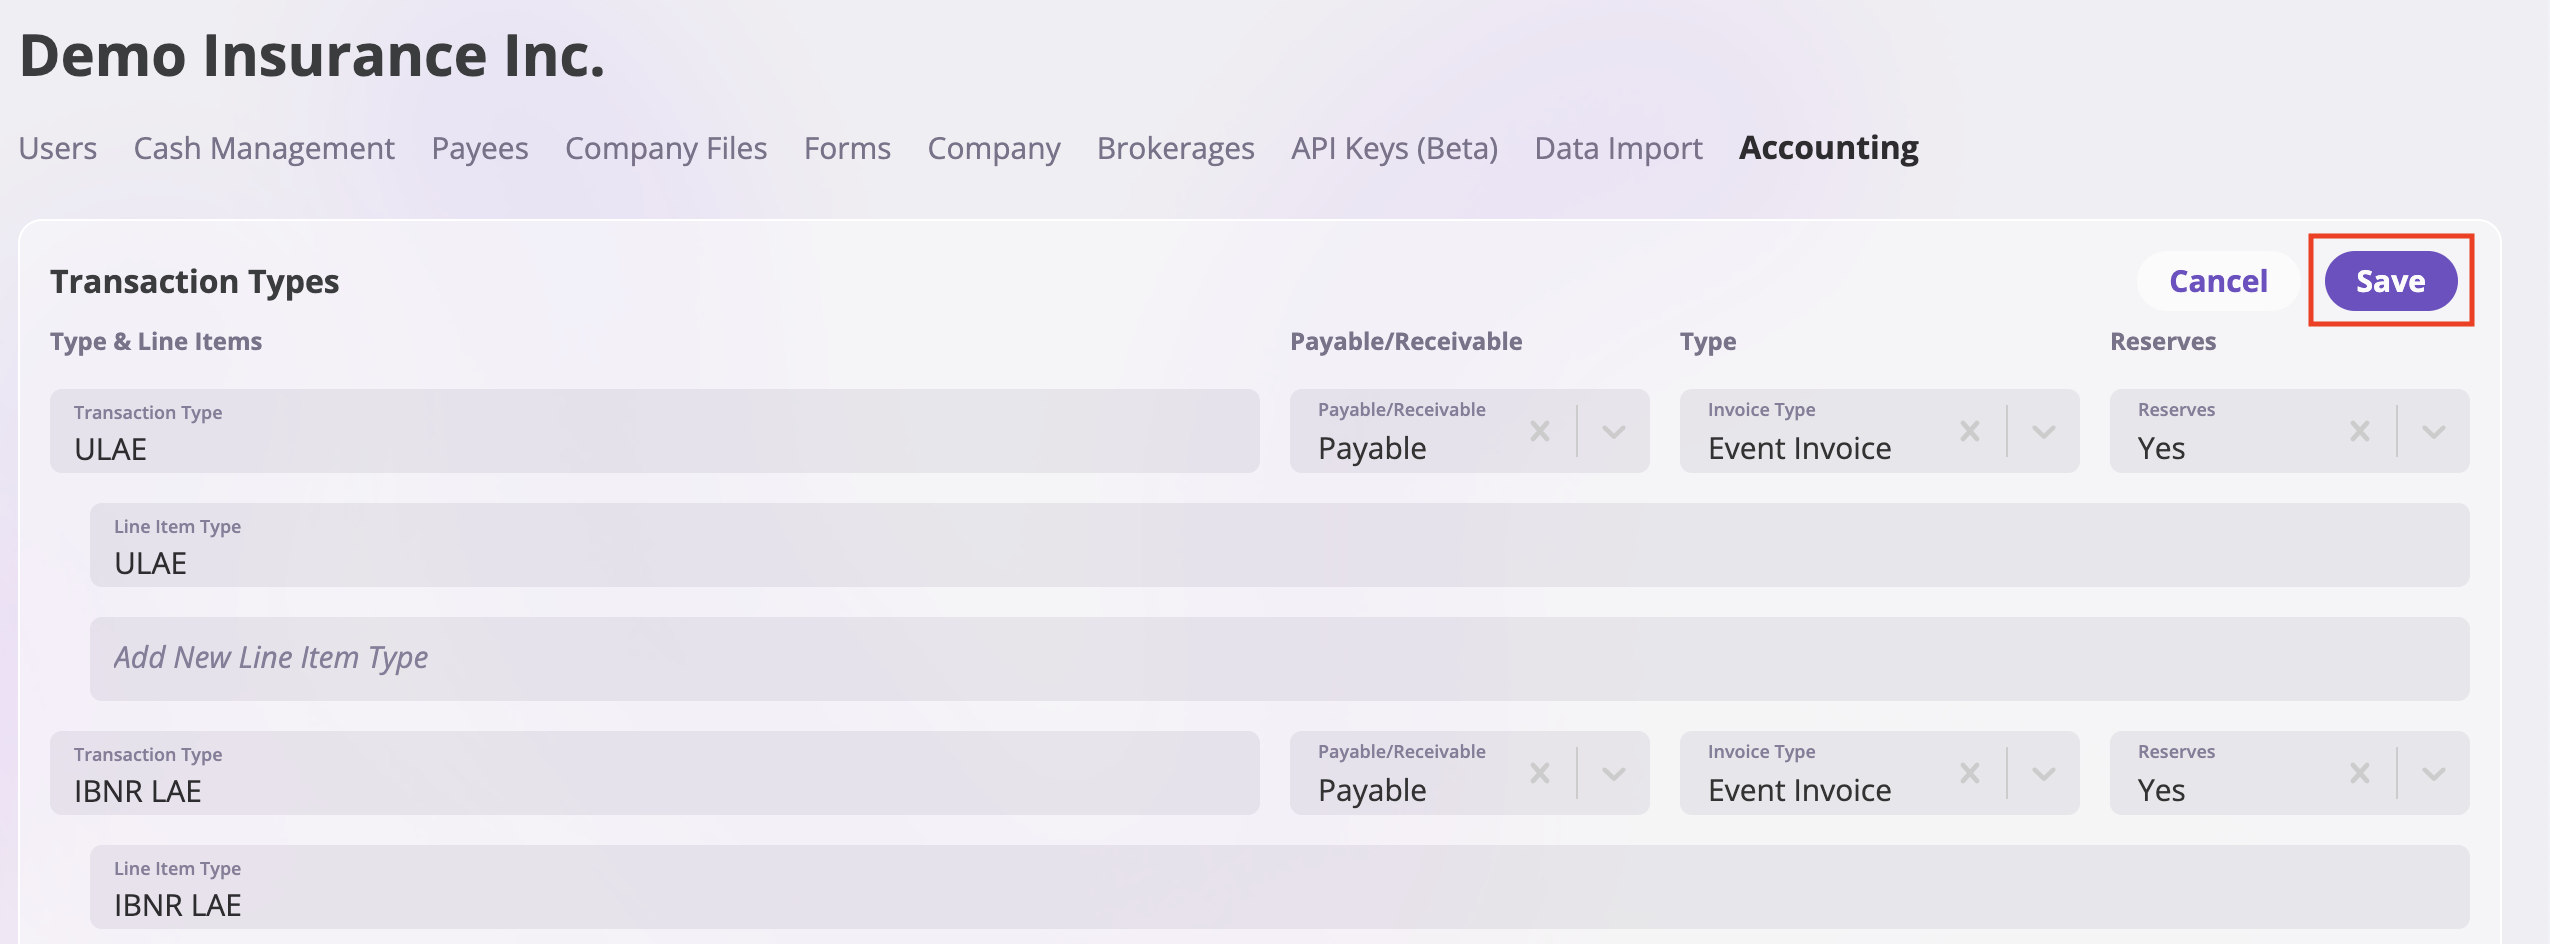
- Configure the settings for your specific needs:
- Payable/Receivable: Choose whether this is money owed by or to the insurance company
- Invoice Type: Select “Event Invoice” for claim-related transactions or “Policy Invoice” for policy-related transactions
- Reserves: Choose “Yes” if this transaction affects claim reserves, or “No” if it doesn’t

Create Parent-Child Relationships
To set up parent-child account relationships:-
Create the Parent Account First:
- Follow the steps above to create your main account (e.g., “ULAE”)
- Set the payable/receivable status, invoice type, and reserves settings
- Save the parent account
-
Add Child Accounts:
- In the accounting table, find the parent account you created
- Click “Add Child Account” next to the parent account
- Enter the child account name (e.g., “ULAE - Legal Fees”)
- The child account will automatically inherit the parent’s payable/receivable status and other properties
- Save the child account
-
Multiple Child Accounts:
- You can add multiple child accounts under the same parent
- Each child inherits the parent’s properties but can be tracked separately
- Child accounts roll up to the parent for consolidated reporting
Repeat for Additional Account Types
You can add as many custom account types as needed by repeating the above steps for each new transaction type you want to create.Save Configuration
- Click Save to apply all your custom account settings
- Verify that all transaction types have been added correctly
Export Policies with Custom Account Data
Navigate to Events
- Go to the Events section from the sidebar
- Select a claim/event from the list
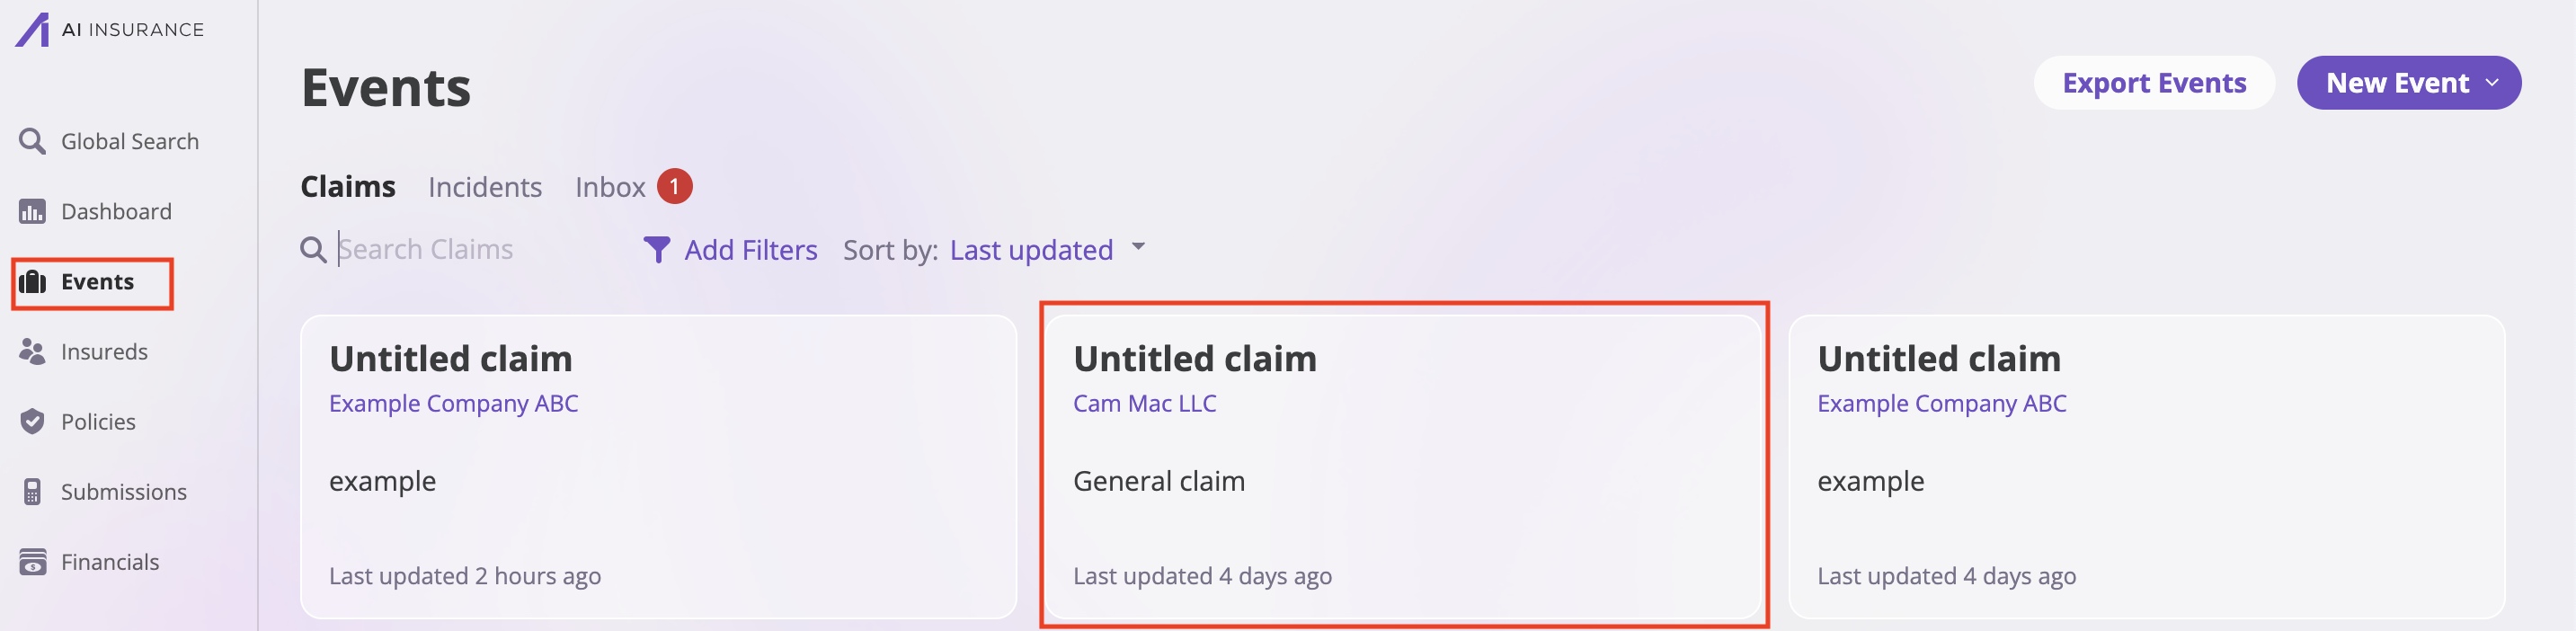
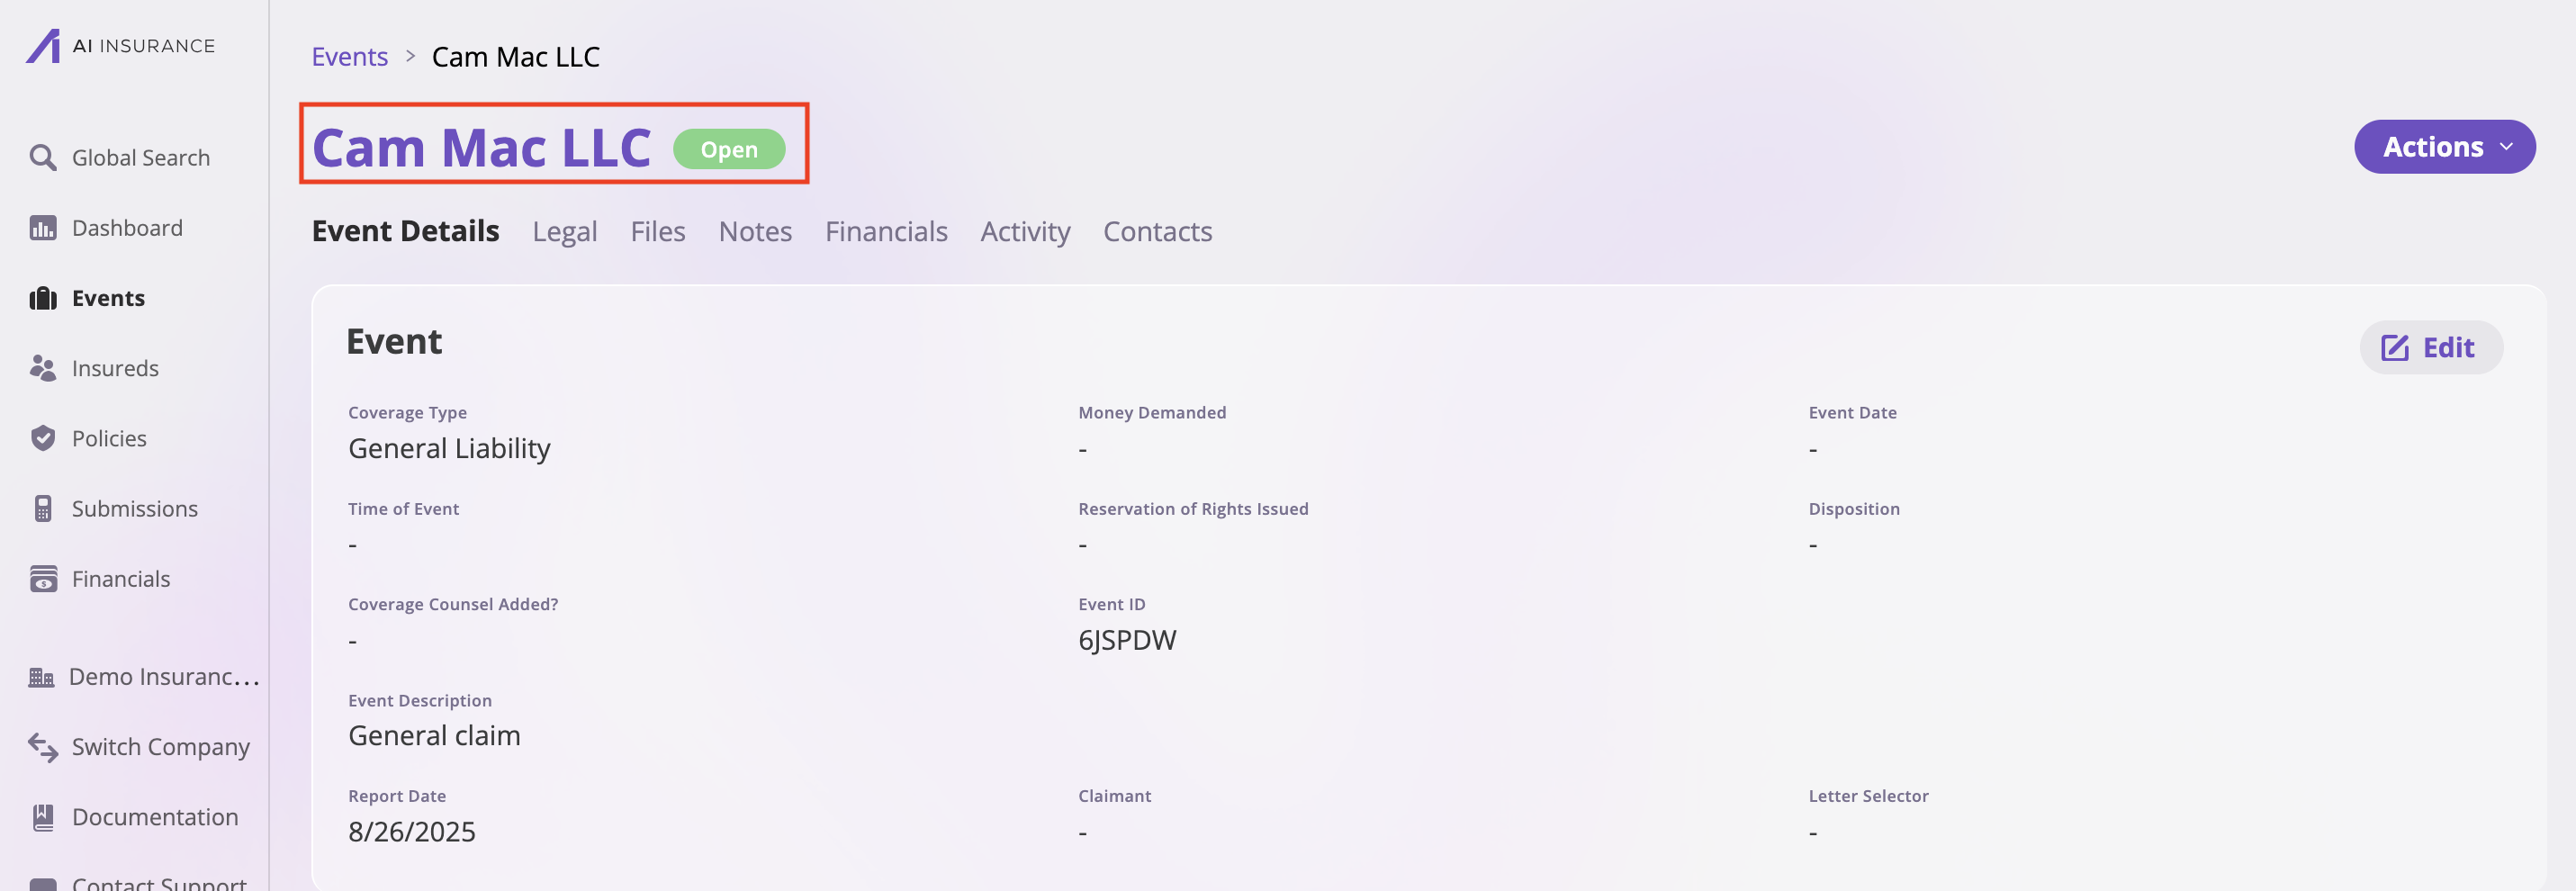
- Click on the event title to open the details
Get Policy Information
- In the event details, na vigate to the Insureds section
- Copy the Policy Number from the policy information
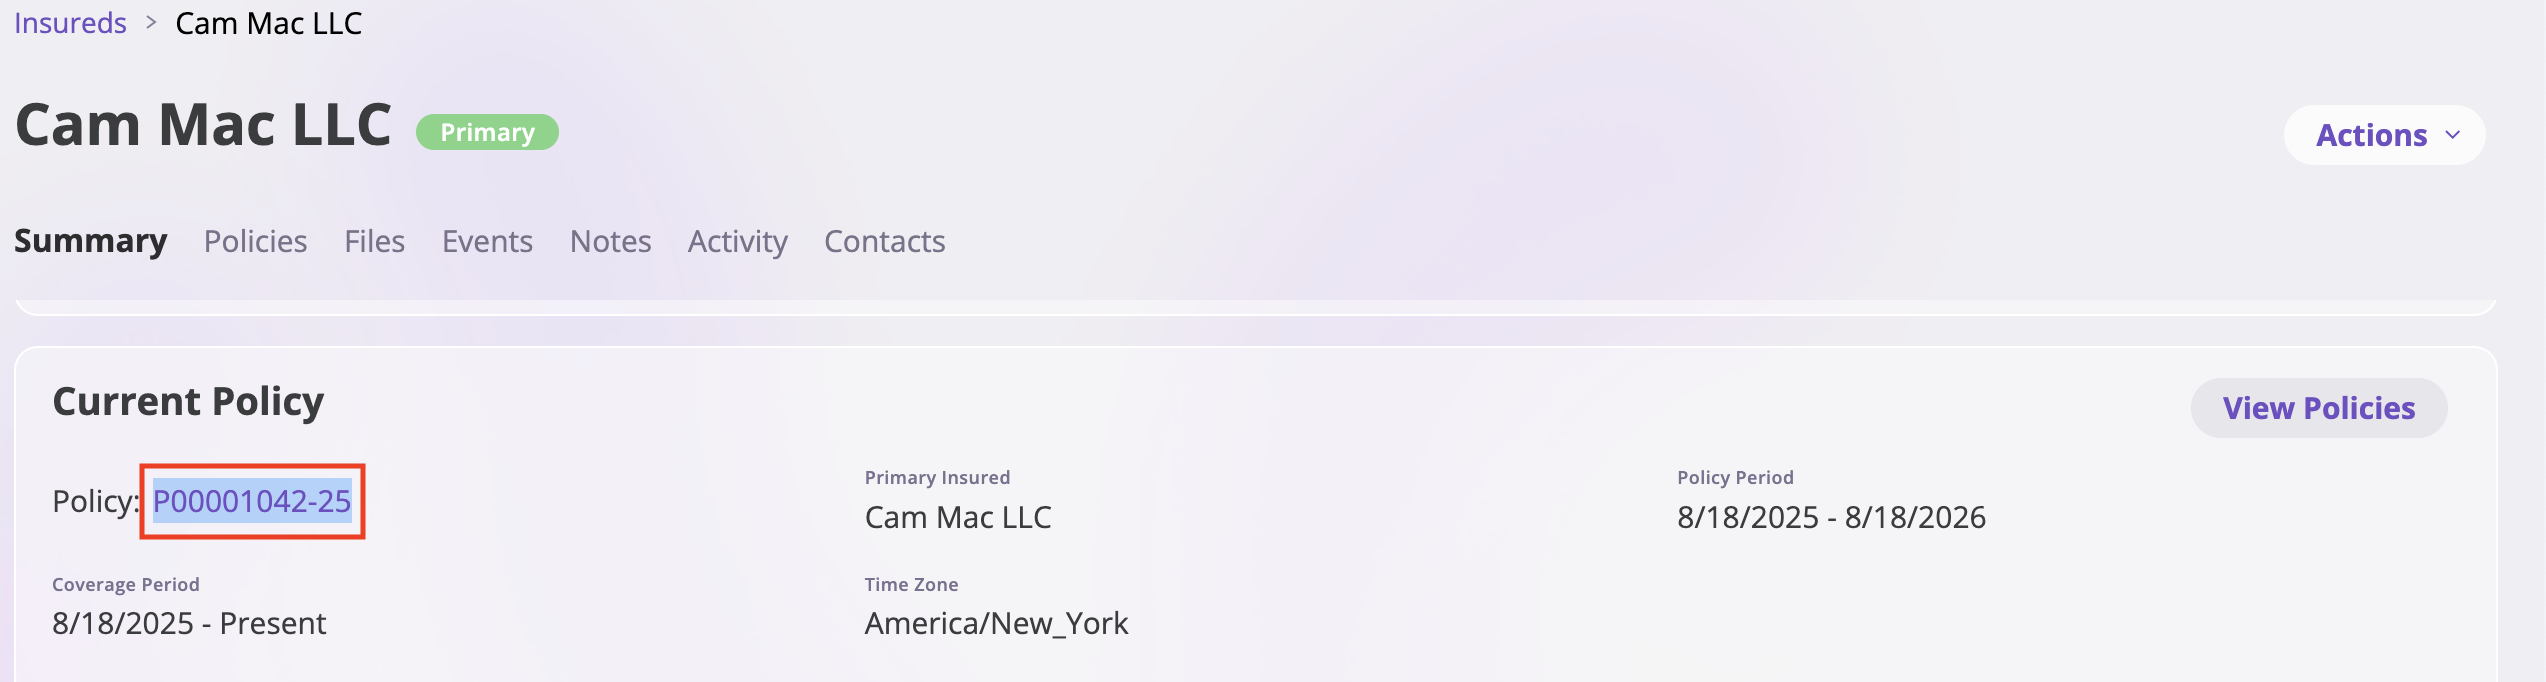
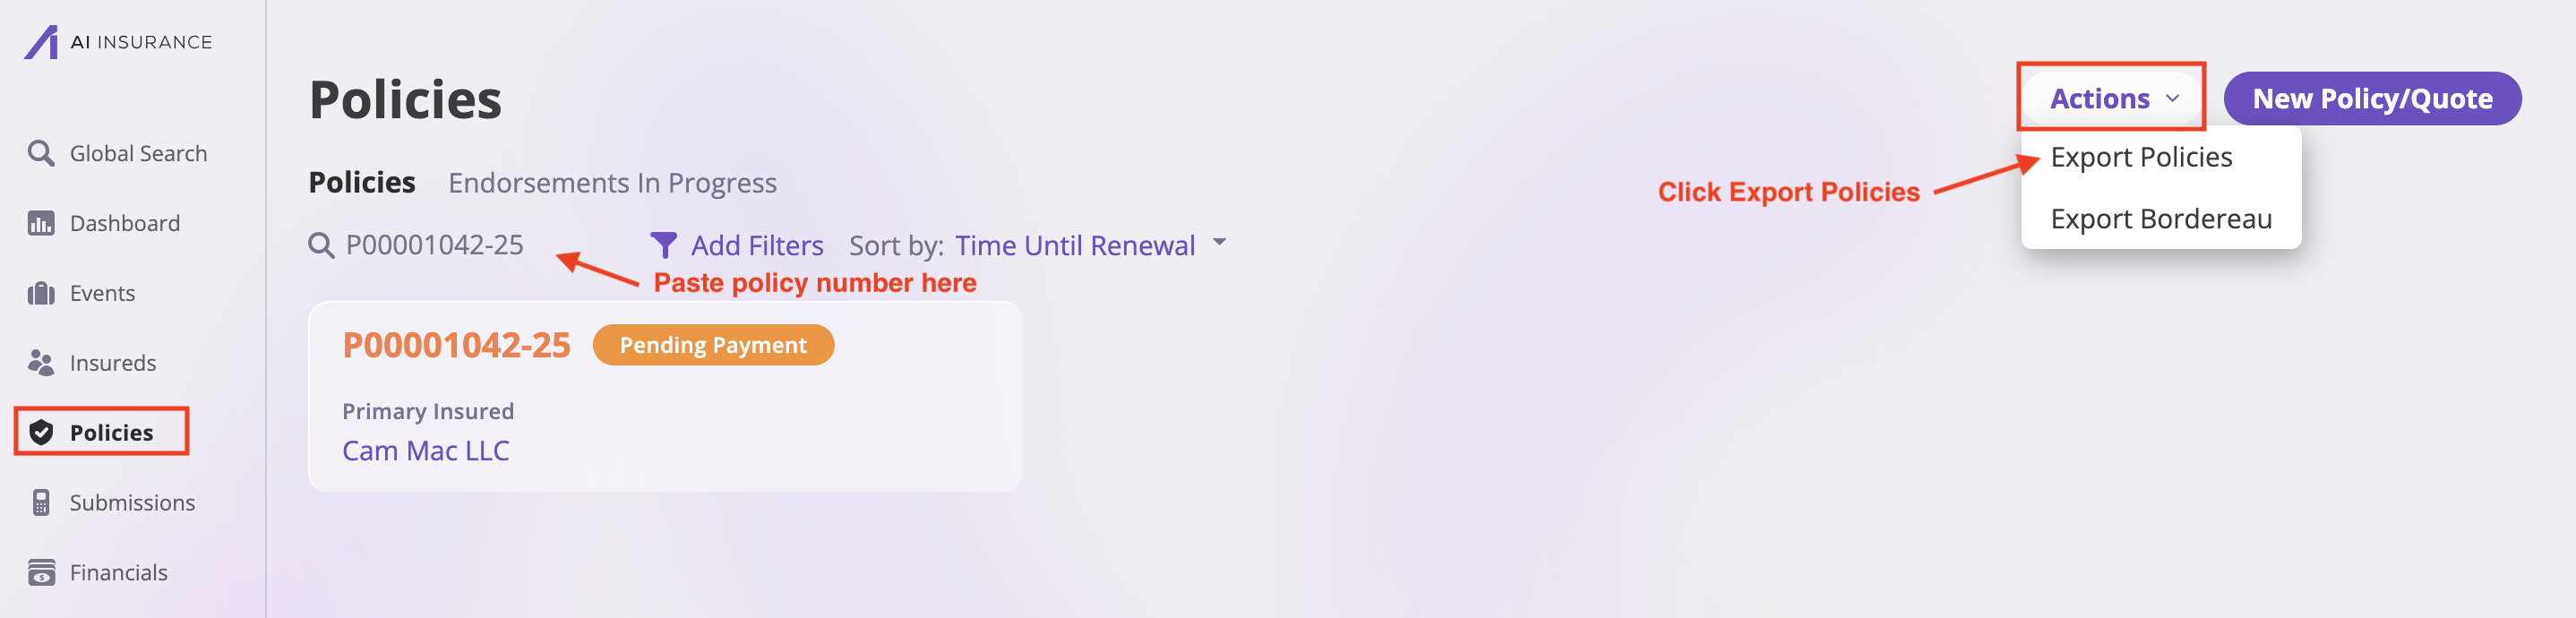
- Navigate to the Policies section from the sidebar
Search and Export Policies
- In the Policies section, paste the policy number into the search bar
- Do not click on the policy - instead, click “Export Policies” in the top-right corner
- In the export dialog:
- Select the fields you want to include in the export
- Choose from available custom account fields (ULAE, IBNR LAE, IBNR Indemnity, etc.)
- Select any additional policy information fields
- Click “Export Policies” to generate the Excel file